
Deploy Citrix Netscaler VPX on Proxmox
Proxmox is probably becoming a widely used open-source KVM hypervisor platform. Its great features are out of the box, making it suitable for many use cases. This article will show you how to deploy Citrix Netscaler VPX on Proxmox and Citrix Netscaler MAS.
Upload Citrix Netscaler KVM Image
Download the Citrix Netscaler KVM image from the Citrix download site and connect to your Proxmox host using your favorite SFTP client, such as WinSCP for Windows or Cyberduck for macOS. Once the KVM image is downloaded, upload the tgz-file to the /var/lib/vz/images/ folder on your Proxmox host. Extract the file once it is uploaded.
Create an Empty VM in Proxmox
Create an empty VM in Proxmox. In this case, I have created a VM with
- 2 vCPUs
- 4 GB RAM
- No HDD
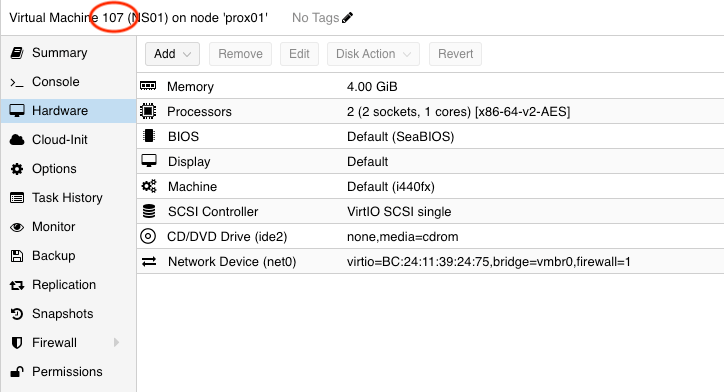
Everything else is standard. Notice the Virtual Machine Name. In this case, it is “107.”
Create Disk from Citrix Netscaler KVM image
The next step is to create a disk for the VM you have just created using the images you uploaded earlier. Connect to your Proxmox host and import the disk to the VM using the following command.
qm importdisk 107 /var/lib/vz/images/NSVPX-KVM-14.1-17.38_nc_64.qcow2 VM_Storage
If we break up the command, the syntax is as follows:
qm importdisk [VM-ID] [imagefile] [VM storage]
Once you fire this command, the disk will be imported. You can follow the progress by the lines coming across the screen, as shown below.
transferred 115.6 GiB of 120.0 GiB (96.34%)
transferred 116.8 GiB of 120.0 GiB (97.34%)
transferred 118.0 GiB of 120.0 GiB (98.35%)
transferred 119.2 GiB of 120.0 GiB (99.37%)
transferred 120.0 GiB of 120.0 GiB (100.00%)
transferred 120.0 GiB of 120.0 GiB (100.00%)
Successfully imported disk as 'unused0:local-lvm:vm-107-disk-0'
The disk will be imported as an Unused disk. Go to the VM in Proxmox, click on “Hardware” and edit the disk.
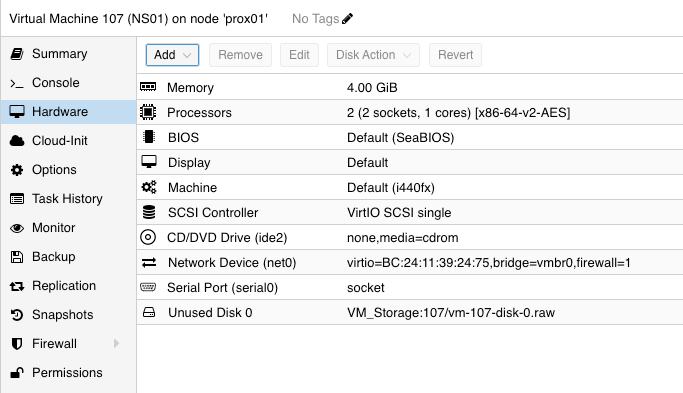
This box will show, and all you need to do is click “Add,” and the disk will be added to the VM.

Create boot order
Once the disk is created and added, you must ensure that the VM boots from that disk. You can find the config file for the VM here:
/etc/pve/nodes/prox01/qemu-server
Open the file that corresponds to your VM ID using this command.
nano 107.conf
In the configuration file, you can see that in the boot order is listed
- ide2
- net0
But the disk we want the VM to use as a boot device is scsi0.
boot: order=ide2;net0
cores: 2
cpu: x86-64-v2-AES
ide2: none,media=cdrom
memory: 4096
meta: creation-qemu=8.1.5,ctime=1710487743
name: NSADM01
net0: virtio=BC:24:11:1F:A0:3B,bridge=vmbr0,firewall=1
numa: 0
ostype: l26
scsi0: VM_Storage:108/vm-108-disk-0.raw,iothread=1,size=120G
scsihw: virtio-scsi-single
smbios1: uuid=3a3e1945-505b-4544-bc83-d597bf6efc8c
sockets: 1
vmgenid: ddb7359c-577c-4610-a890-7e3dea6933dc
Change the boot order as shown below. In the configuration below, the scsi0 device will be the boot device for the VM.
boot: order=scsi0
cores: 2
cpu: x86-64-v2-AES
ide2: none,media=cdrom
memory: 4096
meta: creation-qemu=8.1.5,ctime=1710487743
name: NSADM01
net0: virtio=BC:24:11:1F:A0:3B,bridge=vmbr0,firewall=1
numa: 0
ostype: l26
scsi0: VM_Storage:108/vm-108-disk-0.raw,iothread=1,size=120G
scsihw: virtio-scsi-single
smbios1: uuid=3a3e1945-505b-4544-bc83-d597bf6efc8c
sockets: 1
vmgenid: ddb7359c-577c-4610-a890-7e3dea6933dc
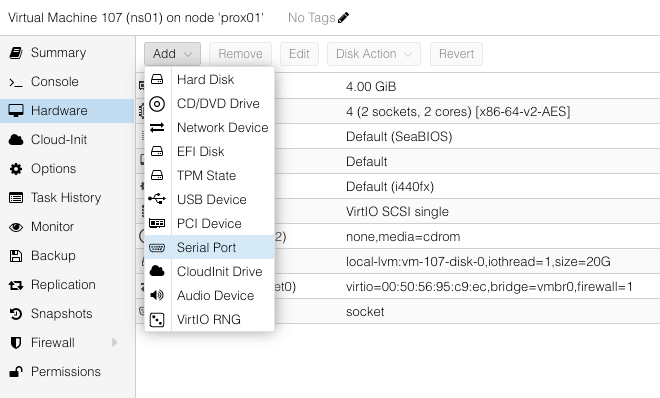
Add serial port
As a final step, you must add a serial port to the Netscaler VM. Go to the hardware configuration and add a serial port, as shown below. Give it the address “0”.
Your Netscaler on Proxmox is ready to boot.
Configure Citrix Netscaler on Proxmox
Once the Netscaler has been booted, log in and start the initial network configuration. Type the commands shown below.
> shell
root@ns01# nsconfig
Go through the network configuration settings, and your Netscaler will be ready.
Configure Citrix Netscaler ADM on Proxmox
If you are deploying a Netscaler ADM, the network configuration commands are as follows.
> shell
root@ns01# networkconfig