
How to Install Spinnaker on Google Kubernetes Engine (GKE)
Spinnaker is a continuous delivery system that enables you to deploy software easily, safely, and fast across multiple clouds. Spinnaker is a powerful CD tool in your CI/CD toolbox with integration to CI tools such as Jenkins. Spinnaker was developed by Netflix and released under the Apache License 2.0 in November 2015. Other tech companies, like Google, have contributed to Spinnaker since then.
This article will show you how to install Spinnaker on a Google Kubernetes Cluster using Halyard. Halyard is used to Install and update your Spinnaker installation.
Prerequisites
Before we get started, there are a few things that you need to prepare. You need to have:
- Google Cloud account
- Machine with Google Cloud SDK installed
- A Google Cloud project
In this guide, I use a project called gcp-spinnaker-project. You can of course choose your own name for the project or use an existing one.
We will create and install components that are necessary for running this guide.
Create A Kubernetes Cluster
The first step is to create a Kubernetes cluster, where we can run Spinnaker. If you already have a cluster, you can skip this step.
This cluster is for testing purposes. If you want to run Spinnaker in production, you might want to consider building a bigger Kubernetes cluster.
gcloud container clusters create "spinnaker-cluster-01" \
	--zone "us-east1-b" --machine-type "n2-standard-2" \
	--num-nodes "1" --no-enable-stackdriver-kubernetes \
	--project "gcp-spinnaker-project"
Create Machine for Halyard
As mentioned earlier, we need Halyard to install Spinnaker. I have chosen to run a machine in Google Cloud. When I do not use it, I can just turn it off and it will not have a cost. Use the command below to create a machine in Google Cloud.
gcloud compute instances create "halyard-workload" \
	--async \
	--boot-disk-size "20GB" \
	--image-family "ubuntu-2004-lts" \
	--image-project "ubuntu-os-cloud" \
	--machine-type "n2-standard-2" \
	--zone "us-east1-b" \
	--project "gcp-spinnaker-project"
Once the machine is created, log in to the machine via SSH by using this command.
gcloud compute ssh --zone "us-east1-b" "halyard-workload" --project "gcp-spinnaker-project"
First step after you are logged in is to install kubectl. Run the commands listed below to install kubectl.
sudo -i
apt-get update && sudo apt-get install -y apt-transport-https
curl -s https://packages.cloud.google.com/apt/doc/apt-key.gpg | apt-key add -
echo "deb http://apt.kubernetes.io/ kubernetes-xenial main" | tee -a /etc/apt/sources.list.d/kubernetes.list
apt-get update
apt-get install -y kubectl
Halyard requires Java to run. To install Java, run the command below.
apt install -y default-jre
You will not be able to run the installation of Halyard with a root user. Run the commands below to create a non-root user.
adduser spinnaker
echo "spinnaker ALL=(ALL:ALL) NOPASSWD:ALL" > spinnaker && chmod 440 spinnaker && mv spinnaker /etc/sudoers.d/
su - spinnaker
You are now ready to install Halyard. Use the commands below to start the installation.
When asked “Would you like to configure halyard to use bash auto-completion?” Click enter twice.
curl -O https://raw.githubusercontent.com/spinnaker/halyard/master/install/debian/InstallHalyard.sh
sudo bash InstallHalyard.sh  --user spinnaker
Create Persistent Storage and Service Account
The next step that we go through requires permissions that are not available for Compute Service Account. You need to configure the Google Cloud SDK with your own credentials. Start the configuration wizard with the command below.
gcloud init
Once you have configured the Google Cloud SDK, create a new IAM service account and JSON key file by running the commands below.
gcloud iam service-accounts create spinnaker \
--display-name "spinnaker" \
--project "gcp-spinnaker-project"
gcloud iam service-accounts keys create ~/.gcp/key.json \
--iam-account spinnaker@gcp-spinnaker-project.iam.gserviceaccount.com \
--project "gcp-spinnaker-project"
Spinnaker creates data that you need store on a persistent volume. We will use a storage bucket for the data. Run the commands below to create the bucket and set the correct permissions.
gsutil mb -l us-east1 -p gcp-spinnaker-project gs://devops-spinnaker-halyard-bucket/
gsutil iam ch serviceAccount:spinnaker@gcp-spinnaker-project.iam.gserviceaccount.com:legacyBucketWriter gs://devops-spinnaker-halyard-bucket
Configure Kubernetes Cluster
Connect to the Kubernetes cluster, with the command below, for controlling and configure the cluster.
gcloud container clusters get-credentials "spinnaker-cluster-01" --zone "us-east1-b" --project "gcp-spinnaker-project"
You then need to create a spinnaker-service-account and assign the correct permissions. Run the commands below.
CONTEXT=$(kubectl config current-context)
kubectl apply --context $CONTEXT -f https://spinnaker.io/downloads/kubernetes/service-account.yml
TOKEN=$(kubectl get secret --context $CONTEXT $(kubectl get serviceaccount spinnaker-service-account --context $CONTEXT -n spinnaker -o jsonpath='{.secrets[0].name}') -n spinnaker -o jsonpath='{.data.token}' | base64 --decode)
kubectl config set-credentials ${CONTEXT}-token-user --token $TOKEN
kubectl config set-context $CONTEXT --user ${CONTEXT}-token-user
Create Halyard Config for installation of Spinnaker
Next step is creating the config for the installation of Spinnaker. First, you need to add the Kubernetes cluster to the Halyard config.
hal config provider kubernetes enable
hal config provider kubernetes account add spinnaker-cluster-01 --provider-version v2 --context $(kubectl config current-context)
hal config features edit --artifacts true
hal config deploy edit --type distributed --account-name spinnaker-cluster-01
Bucket in Halyard Config
Add the bucket storage to the config.
hal config storage gcs edit --bucket devops-spinnaker-halyard-bucket --project gcp-spinnaker-project --bucket-location us-east1 --json-path ~/.gcp/key.json
hal config storage edit --type gcs
Choose Spinnaker Version
You need to choose which version of Spinnaker you wish to use. Run the command below to get a list of versions available.
hal version list
Once you know which version you want to run type in this command. Change the version to the one you want to use.
hal config version edit --version 1.25.0
Deploy Spinnaker with this command.
hal deploy apply
Finish the installation of Spinnaker
The installation of Spinnaker will begin. Use the command below to follow the progress of the installation.
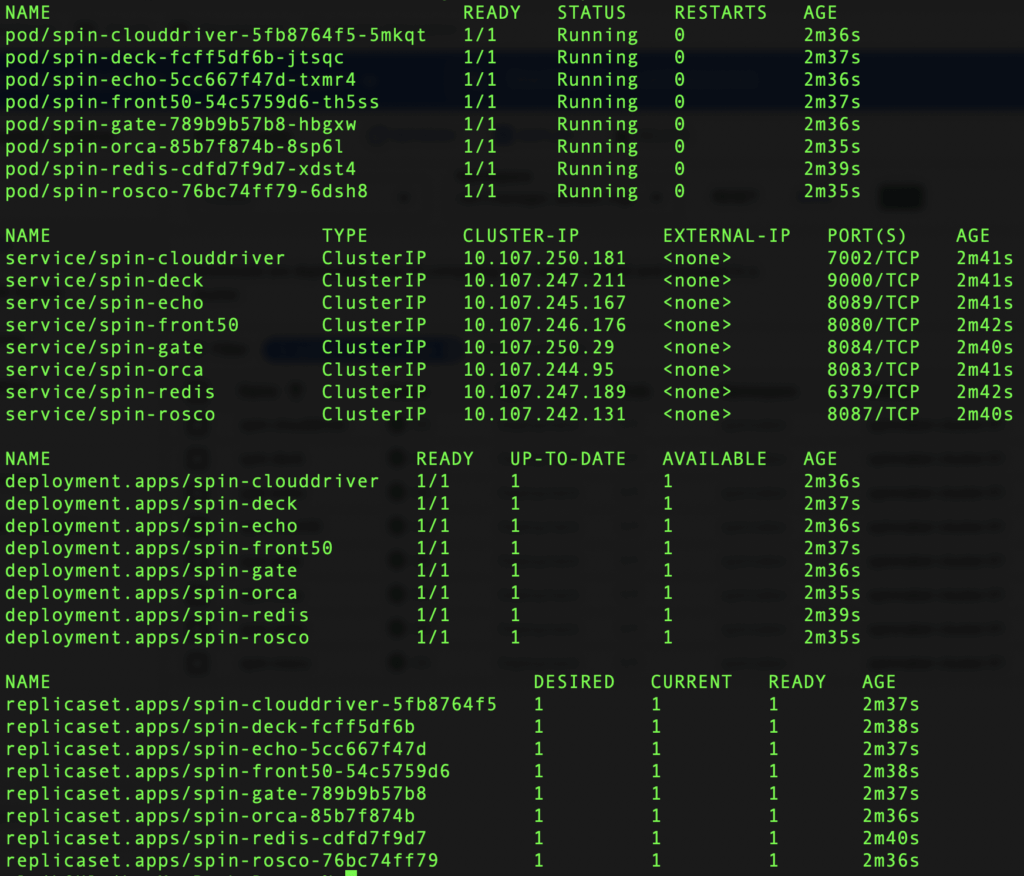
kubectl get all -n spinnaker
When the installation of Spinnaker is done, you will see this:
Hopefully, your installation is done successfully. If you have any questions, fell free to contact me. I will do my best to answer all of you.
Hi Ulrik,
Thanks for the article
but it looks a kind of outdated.
For example InstallHalyard.sh script does not accept –username parameter
and creates `spinnaker` user itself.