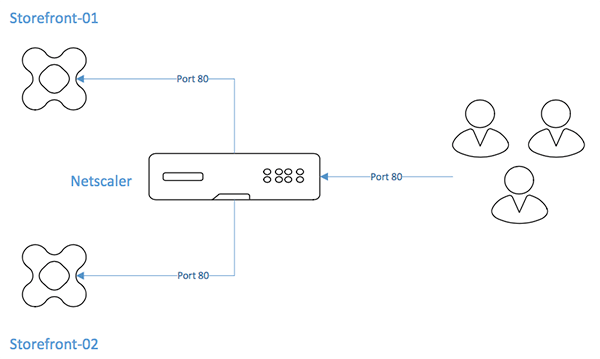
Guide on How to Load Balance Storefront with Netscaler
This article will show you how to load balance Storefront. I will start by showing how to load balance using port 80 to the Netscaler and port 80 the backend Storefront servers.
Create Monitor for Storefront Servers
The first thing you need to do is create monitors for your Storefront servers. To do that go to:
Configuration->Traffic Management->Load Balancing->Monitors and click “Add”.
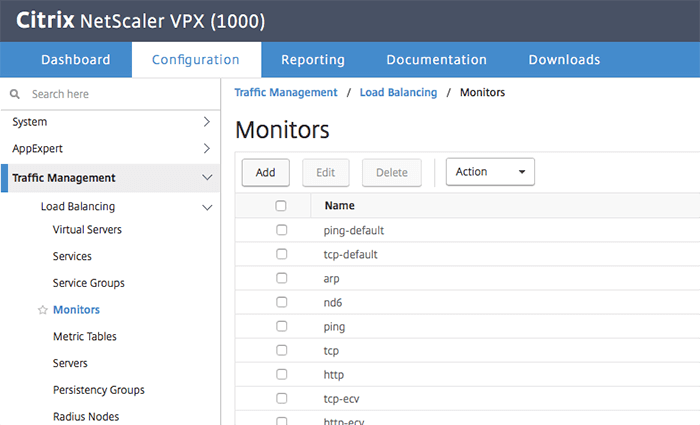
Give the monitor a name. Is this example I simply gave it the name Storefront. In the drop-down, select “STOREFRONT”. Click on Special Parameters and write “Store” in the Store Name as shown underneath. Uncheck “Storefront Account Service” and Check “Check Backend Services”.
Click “Done” to create the monitor.

Create Servers
Now you need to add your Storefront servers. To do that go to:
Configuration->Traffic Manangement->Load Balancing->Servers and Click “Add”.
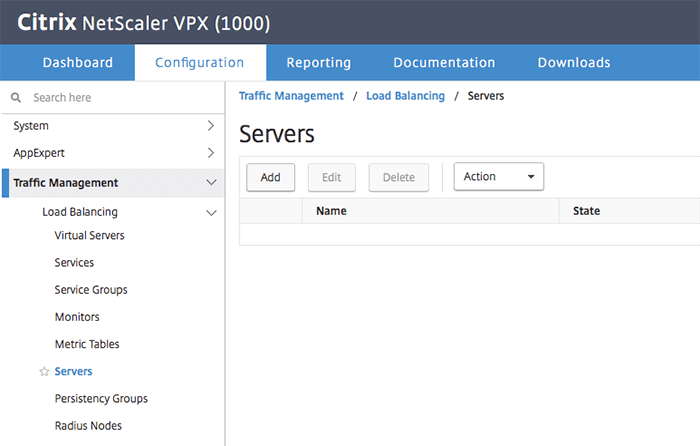
Give the server a name as shown below. You can choose to add your servers using IP address or your servers FQDN. In this example, I have used the IP address.
Once done, click on “Create”.
Do the same with the rest of your Storefront servers.

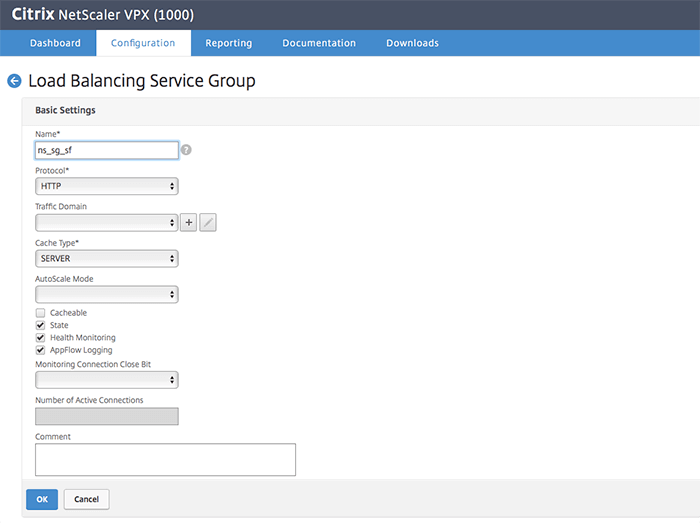
Create Service Group
The next step is to create a service group. Service groups can be found here:
Configuration->Traffic Manangement->Load Balancing->Service Groups.Once you get there, click “Add”.
Once you get there, click “Add”.
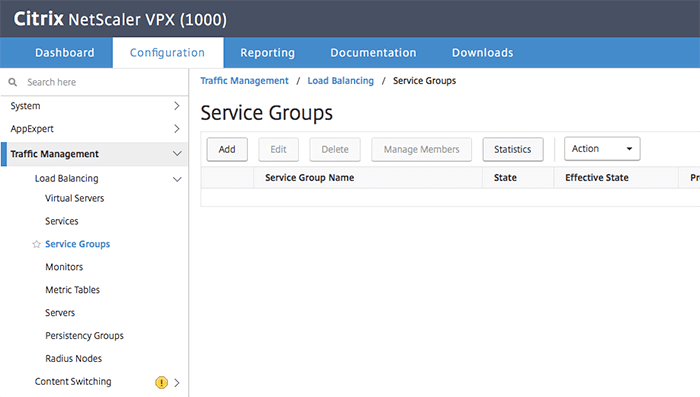
Give the service group a name and click “OK”.
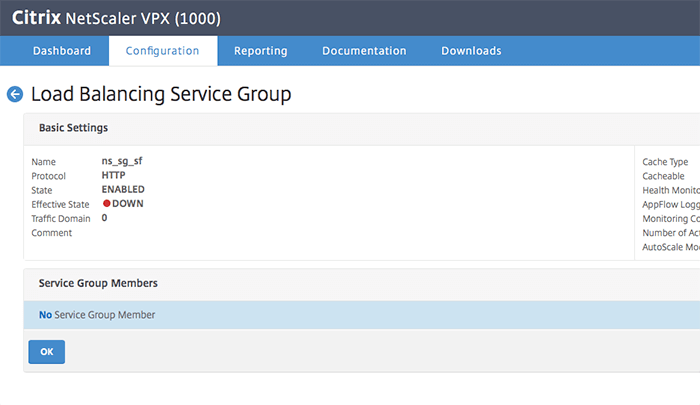
The service group will be created but will be down. The reason is that the service group doesn’t have any service group members. Click on “No Service Group Member” which on the screenshot below.
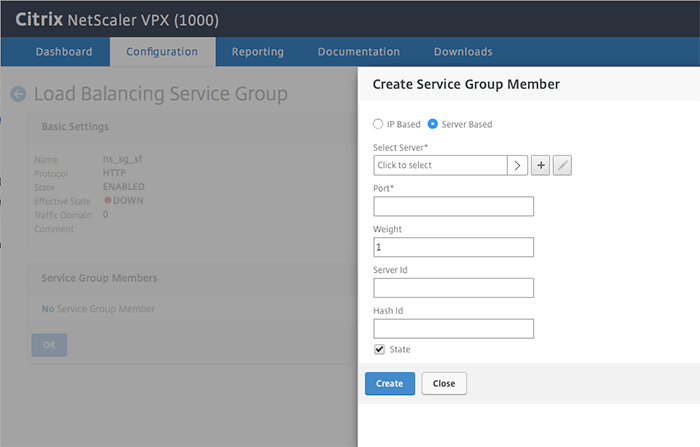
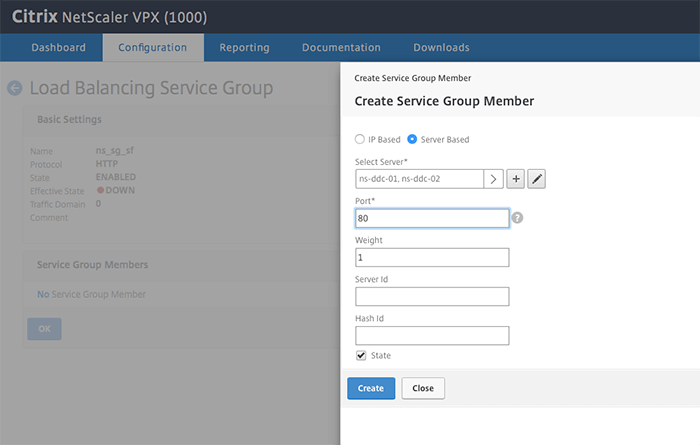
You can choose to add service group members by using IP address or server based, which is servers that you already have created. Since you already have created your servers, click on “Server Based”. After that, Click on “Click to select”.
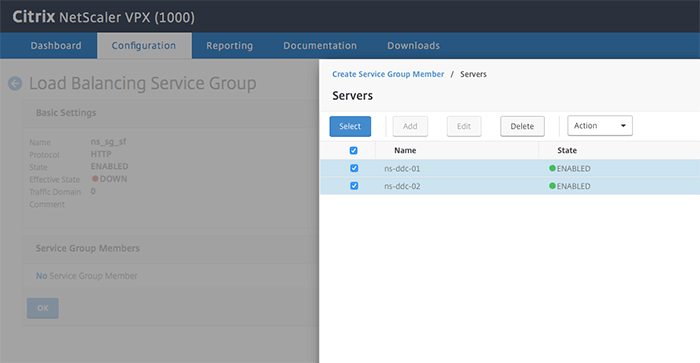
Choose your two Storefront servers and click “Select”.
Write “80” in “Port” and click “Create”
You have now added your two Storefront servers to the service group. Click “OK” to save the changes.
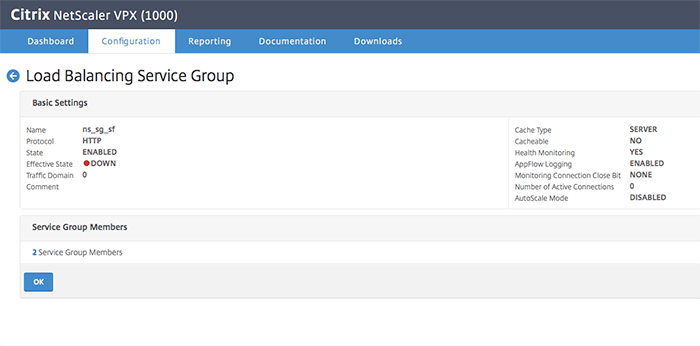
Your service group is now “Up” and is working as shown below.

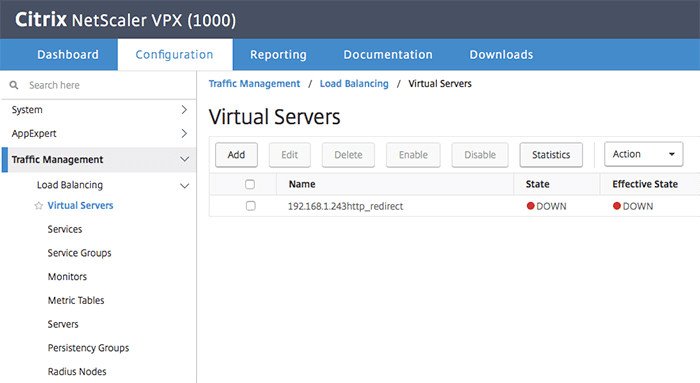
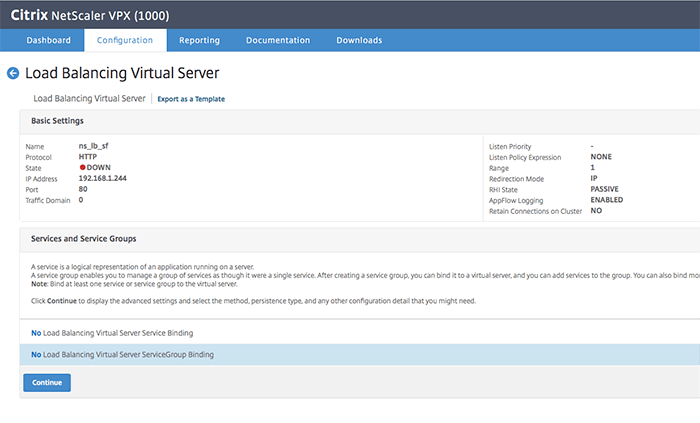
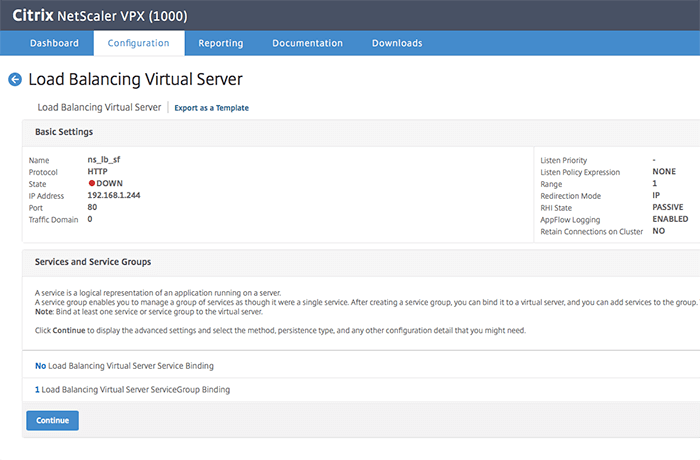
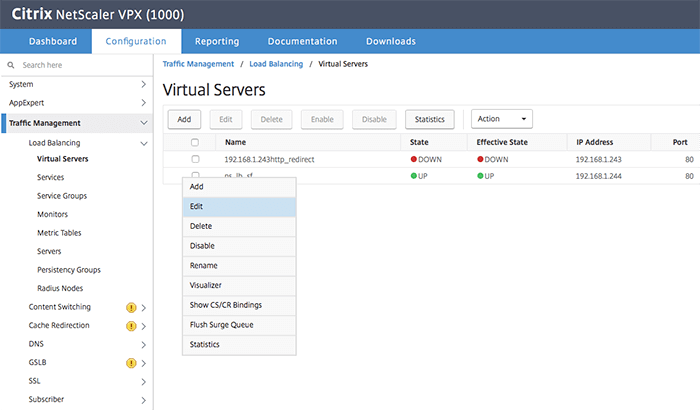
Create Virtual Server
Now you need to create a virtual server load balance Storefront. You can do that here:
Configuration->Traffic Management->Virtual Servers
Once you get there, click “Add”.
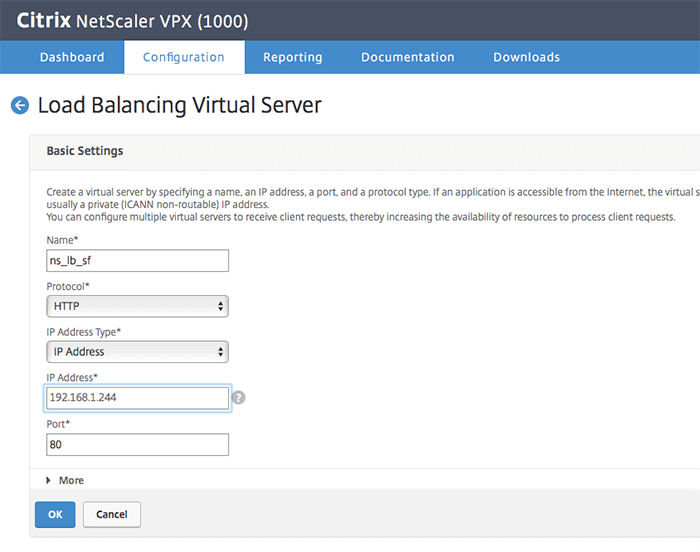
First, give your load balancing virtual server a name. Then choose HTTP as your protocol. Lastly, give your load balancing virtual server an IP address. Click “OK”.
Once the server is created, the state will be down. This is because it doesn’t have any bindings. In order to do that, click on “No Load Balancing Virtual Server ServiceGroup Binding”, as shown below.
Click “Click to select”
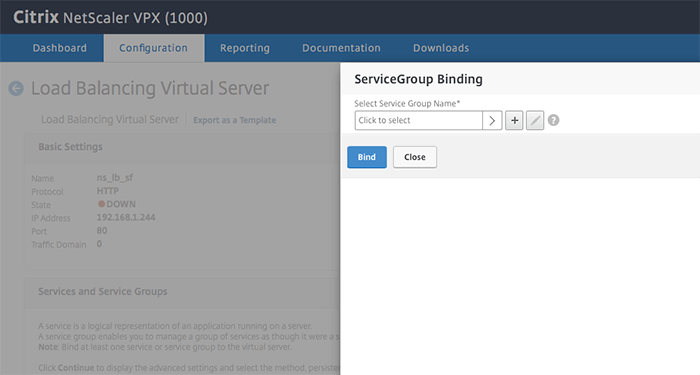
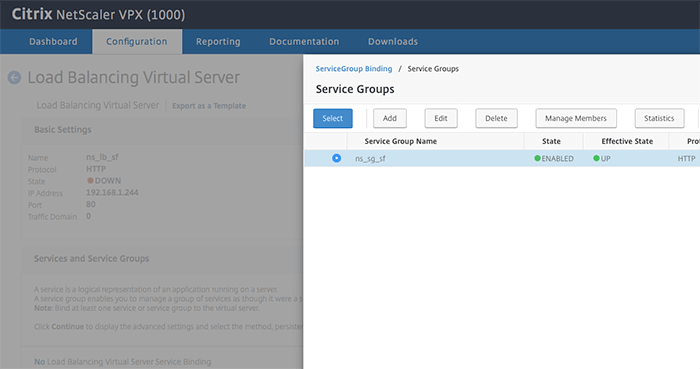
Choose Storefront service group that you created earlier and click “Select”.
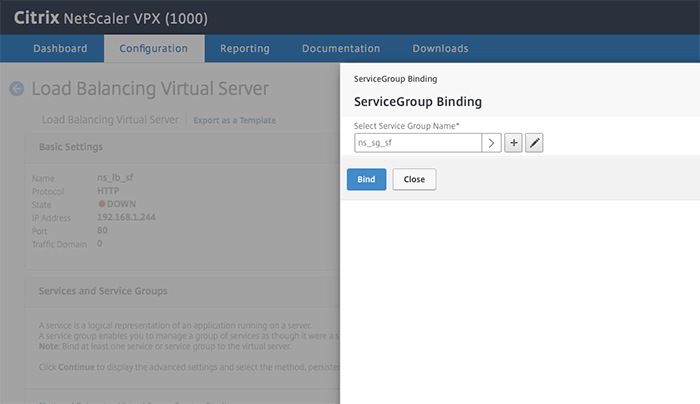
Click “Bind”.
Click “Continue”
Your load balancing virtual server is now created, but there two extra settings you need to do. Click “Edit” on your load balancing virtual server as shown above.
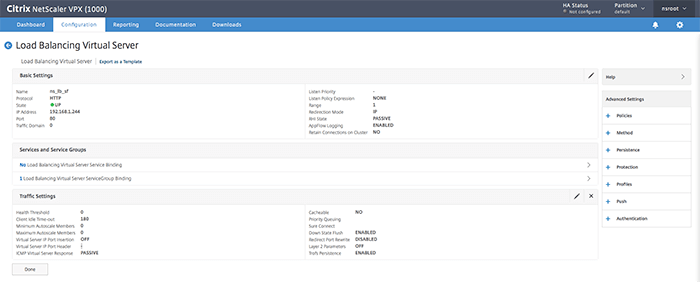
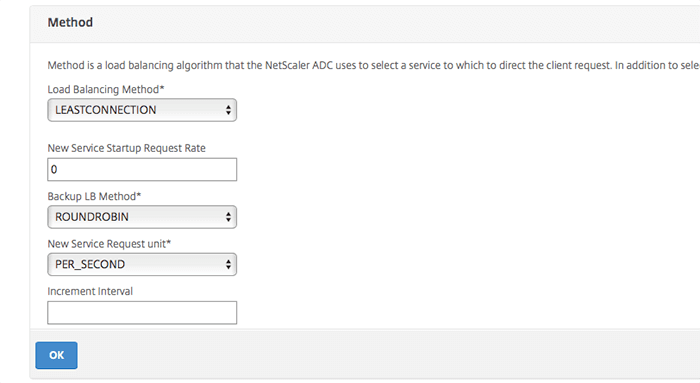
In the right side of the screen, click on “Method” and “Persistence”. Configure the two settings as shown below.

If you access your IP address, you will probably end up at the standard IIS page. That is because you need to be redirected to /Citrix/StoreWeb to hit the Storefront store. You can solve this more than one way, but the fastest way is to add this JavaScript in an index.html file in your inetpub folder.
<script type=”text/javascript”>
<!–
window.location=”/Citrix/StoreWeb”;
// –>
</script>
This is how you load balance Storefront using Netscaler. If you have any questions or comments, let know by leaving a comment below.
We’re having some real fun when using SSL (443) offloading on the Netscaler LB vServer, but HTTP (port 80) from the Netscaler inside to the actual Storefront servers (2012R2 with IIS8.5 and XenApp7.15 LTSR). The IIS insists on redirecting to the exact URL (including case and a trailing slash!) but as the Storefront server thinks it is being accessed by port 80 it redirects the original (slightly “misspelled”) HTTPS:// URL to http://. This of course breaks the system (page not found). And we have resorted to redirecting to correct URL in Netscaler policies. ALso considering using certificates between NS and SF servers althoug they are in the same subnet :-/. Brgrds Jørn
Hi Jørn
I can tell you that I have removed the binding on port 443 on the default site on my IIS.
I hope that will help you.
Best,
Ulrik Christensen
Hello Ulrik,
I appreciate your site and specially this post. I am new to the Netscalers. I was looking for a page that would walk me through it. This posting did just that. I am grateful for that. However, I ran into an issue with my Virtual Server as it state is down. The Server and the Service are in a up status. But the Virtual Server is down. I can’t for the life of me see why. The monitor is added and bound and the service is bound to the Virtual server as well. If you can help. I would be very appreciative.
Hi Ulrik, I found out why. I have he VIP setup as SSL and didn’t have a Cert Bound to it. Once bound a Cert to the VIP. It came on line.
Yes, that is true. You need to bind a certificate if your VIP is set up as SSL. Good to hear that you got it to work.
We have load balancing enabled however I need to enable ‘Check Backend Services’ on the monitor. When I change the port from 8000 to 443 will the monitor show a ‘Sown’ state? If so will this prevent new connections or are connections still permitted even in a down state?
*’Down’ sorry for typo
Hi Nathan
If your load balancing service state is down, users will not be able to access the service.