Run Windows 11 using VMware Fusion
Windows 11 was is now released for the general public and I went and downloaded an evaluation on Windows 11 to see what all the fuss was about. I am a Mac user, so I have for years used VMware Fusion to run VMs on my Mac. I soon learned that if you want to run Windows 11 using VMware Fusion, you need to go through a few extra steps to make work.
Download the Windows 11 ISO
You can download a Windows 11 Eval ISO from Microsoft Evaluation Center.
Create the Windows 11 VM
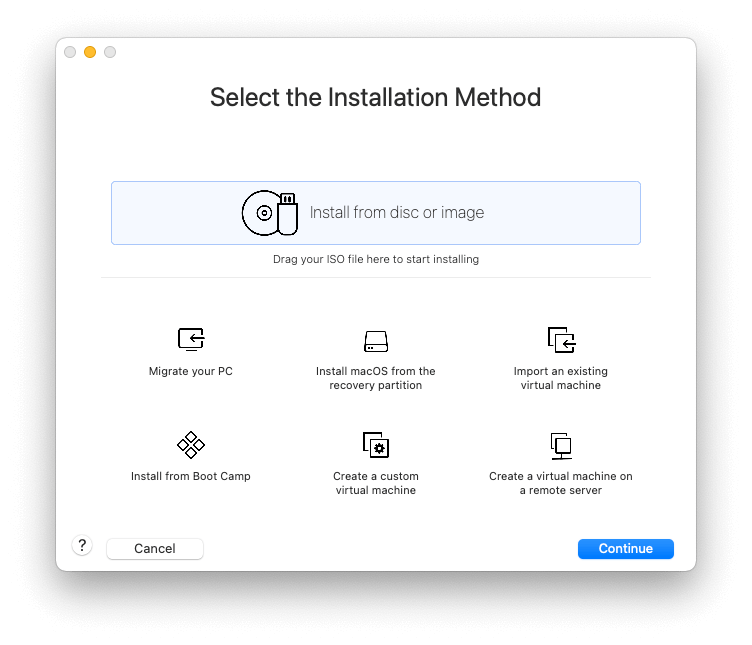
Go to VMware Fusion and start the wizard to create a new VM. Select “Install from disc or image” and click “Continue”.
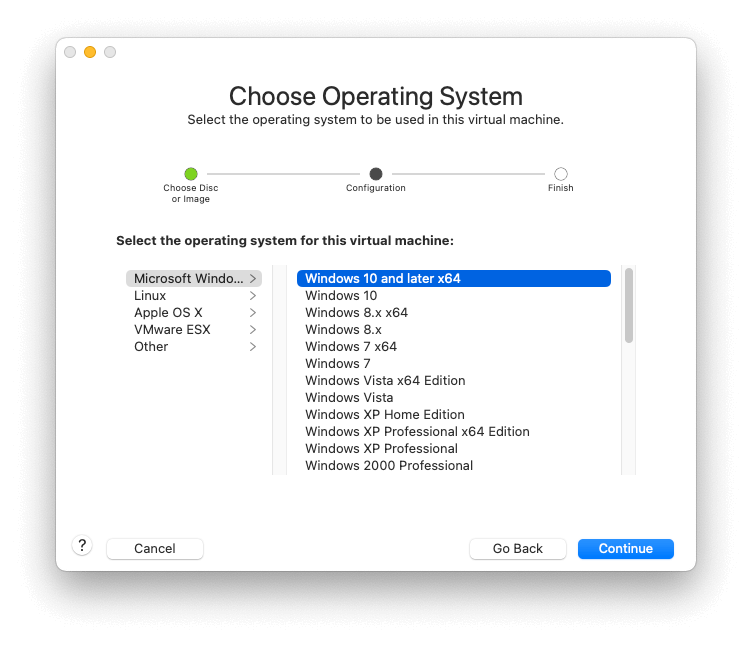
Choose “Windows 10 and later x64” as the operating system.
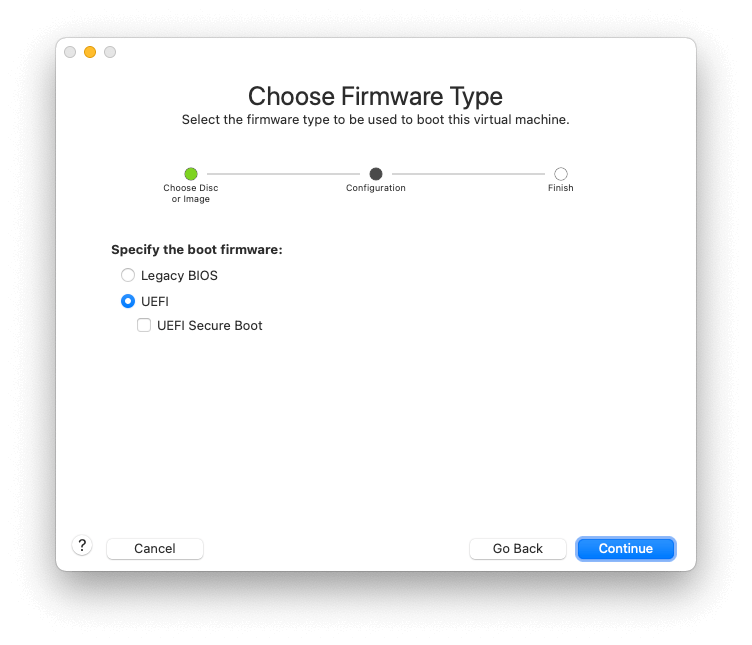
Choose “UEFI” as the firmware type.
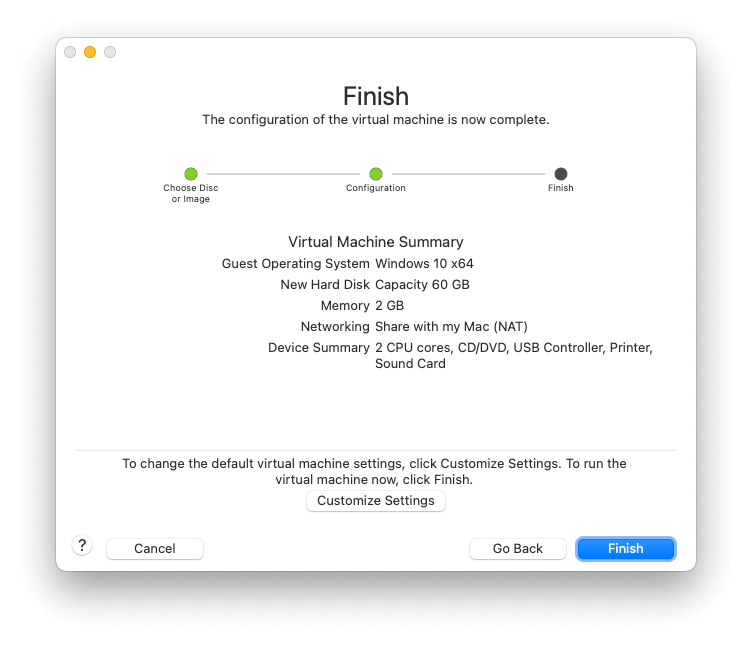
Click on “Customize Settings”.
Click on “Encryption” as shown below. Enable Encryption and choose a password. You will need this password every time you boot the VM.

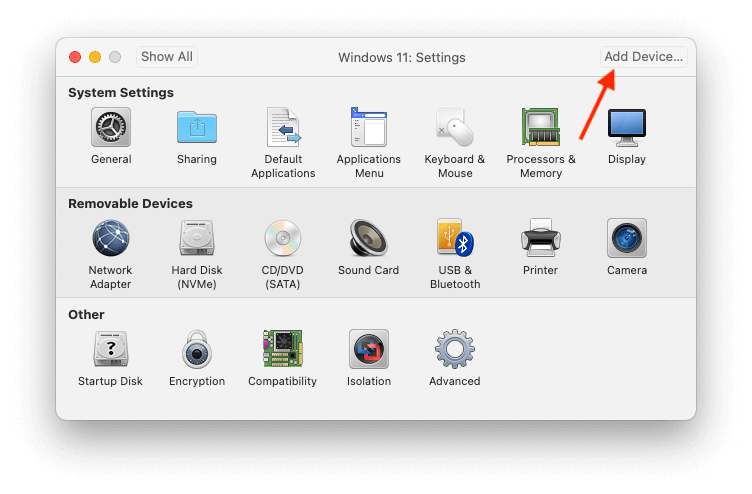
The next step is to add the Trusted Platform Module. Click on “Add Device”.
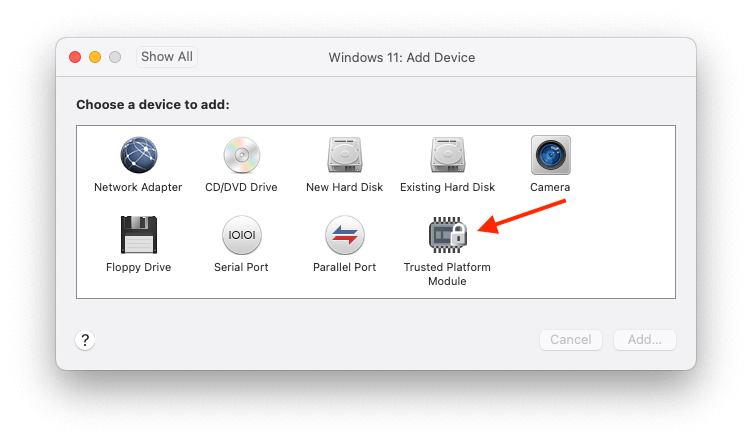
Click on “Trusted Platform Module” and click on the “Add” button.
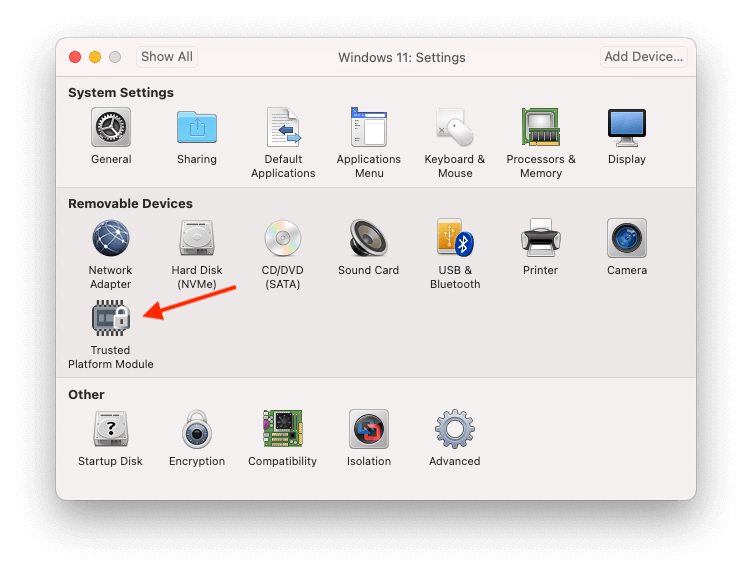
The Trusted Platform Module now appears in the settings. Add vCPUs and memory to your VM as need as well in this step. Windows 11 requires 2 vCPUs and 4096 MB of memory as a minimum.
Installing Windows 11 using VMware Fusion
You are now ready to install Windows 11 using VMware Fusion. Boot up the VM and go through the steps to start the installation process.
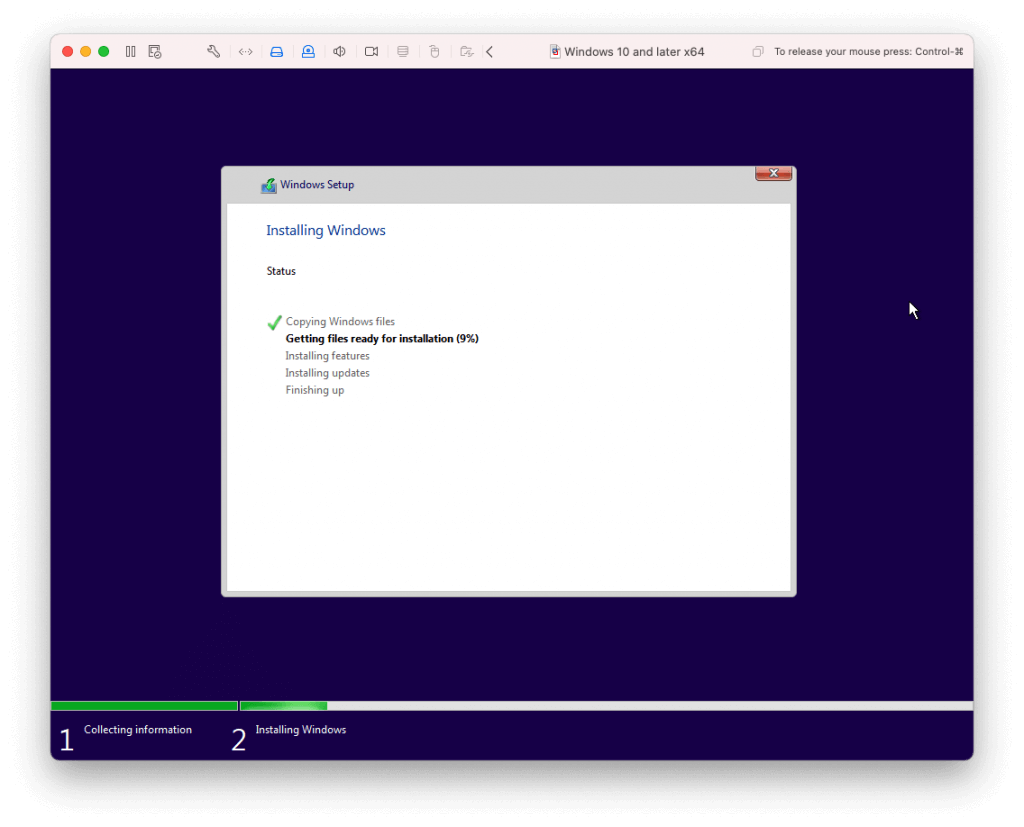
Let the installation finish and you are now ready to use Windows 11 using VMware Fusion.
I have WMware Fusion Player Version 12.2.1 on my 2019 16-inch MacBook Pro. Will I be able to install Windows 11 following the steps you have described in this article?
No. You need a paid version of VMware fusion to get access to TPM.
I’m using Player Version 12.2.1 (18811640) on my 2018 15-inch MacBook Pro. I can confirm that you do not need a paid version to have access to TPM.
I stand corrected. You are absolutely right. I got my information from an outdated source. I have now tested the VMware Fusion player and this guide can be used as well.
any way to update an existing VM image of Win 10? the i7-7700HQ is currently not supported and won’t auto-update. reinstalling every Win app is very expensive and MS is not friendly on moving office like this…
I do not know of any other way than the auto-update method.
I have just downloaded vmware fusion 12 pro from vmware download site but during the installation I never get ask for a product key and even the Software End User License Agreement that I supposed to be click the “Agree” button and instead the installation jumped directly to “Select the Installation Method” until I get the message “This PC can’t run Windows 11” I can’t even access the customize setting such as “Enable Encryption” in order to add TPM. Thanks in advance to those who will answer.
Remember to turn on UEFI and have TPM 2.0 (not 1.x) Enabled then have at least two cores, 4Gig RAM and the disk space that is listed below. There is also a link to another Win11 article that talks about updating BIOS for physical machines. That’s a signal that Microsoft is pushing the boundary of what is generally available. So you’ll have to change settings on your VM to accommodate, it might be 3d capability that you’re missing, or TPM 2.0 when 1.x is enabled, or settings in VMWare BIOS. Go through the doc carefully and make sure you know what all the options mean.
Microsoft’s Windows 11 specs:
https://www.microsoft.com/en-us/windows/windows-11-specifications
Thanks!