XenServer will not boot after installation
The other day, I installed XenServer 6.2 on my new Lenovo ThinkCentre. That would be a great idea since Citrix announced that XenServer is now Open Source.
After the installation was done, I was not able to boot on the new installation of XenServer. After some asking around, I found this solution:
Boot on the XenServer Installation Media
The first thing you need to do is boot up your host using the XenServer installation media.
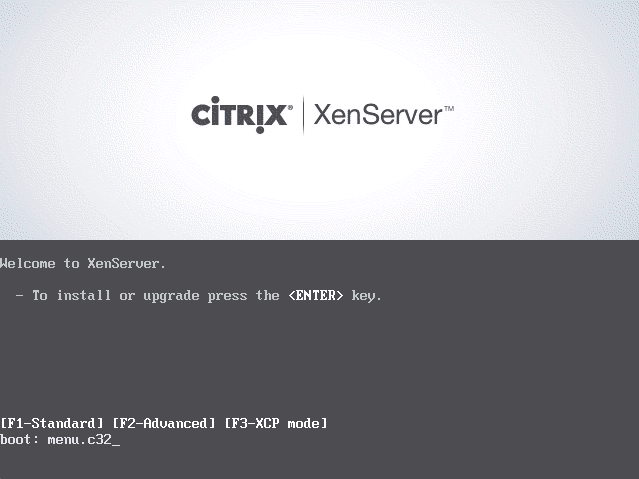
Type menu.c32
Once you get to the installation screen, you need to type
menu.c32
and press enter. (See screenshot below)

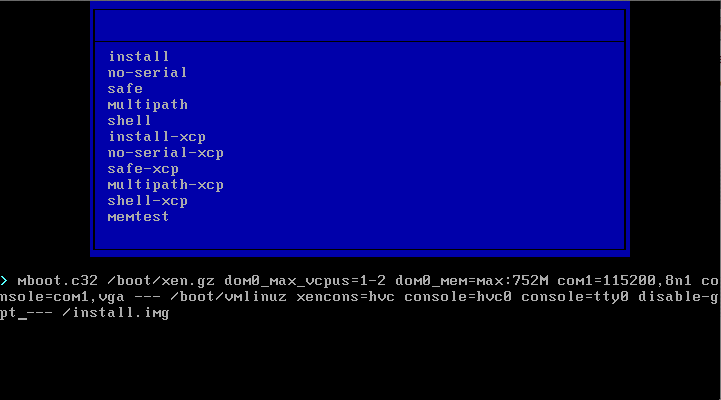
Edit installation string
Press the “Tab” button on your keyboard. The installation string will now appear in the command line. Just before the last ’—’, type
disable-gpt
as the picture below and press enter.

Run through the installation as you always do. After the installation is done XenServer will now boot up.
This issue can be experienced on Lenovo computers and IBM servers.

Thank you!!!!!!!!!!!!!!!!!!!! The same solution is valid for LG-ALLINONE
Thanks a bunch! Same solution worked for an old Gateway DX-4860.
Works great with XEN SERVER 7 installed from USB.
Thank you so much, can you explain me please what happen if GPT is on.
Thanks again.
Thank you much! Same worked for “Intel Desktop m-board DH61BF”
Thank you so much it works with XEN SERVER 7 installed from USB. on lenv0 t420s
Thank You
Solved it for me with XenServer 7.1 and an Acer Desktop XC600 from 2013.
Probably something with its UEFI bios, that cannot handle a GPT boot record with fallback to MBR. A drawback is, that on a 10 T hdd, XenCenter can only see 2 T.
Just like to confirm that this works on 7.2.0 too. Thank you for sharing!
Great it works with W520
Lifesaver! Banging my head against wall trying to figure this one out. Why it has to be so problematic! Thank you for the write up!
Thank you very much. Very helpful. My XenServer host is finally running and works just perfect.
It worked for me on Xenserver 7.6 on a Dell Inspiron
I have noticed you don’t monetize ulrikchristensen.com,
don’t waste your traffic, you can earn additional cash every month with new monetization method.
This is the best adsense alternative for any type of website (they approve
all sites), for more info simply search in gooogle: murgrabia’s tools
This helped me just today on xenserver 7.6 on a dell t130. Thank you.
It worked on Dell XPS. Thanks!
Great. Working like a charm on IBM X3100M4. Thanks alot!!!
Sir. Could u please help me . Im trying to install xensever on my ibm X3100 M4. Tried the workaround but still not able to boot from the harddisk.
Thank you very much.
This solution worked Citrix Hypervisor(Xenserver) 8.1.0 on Lenovo Thinkcentre M82.
Thanks man!! This saved me lots of time!!
Ulrik,
Many thanks for this.
Saved me too (IBM x3650 M3).
I owe you one…
Excelente , después de 3 horas de buscar la solución por fin un buen tip. Solucionado.
Gracias!!!
Here is some background info on this:
https://docs.citrix.com/en-us/citrix-hypervisor/install/partition-layout.html
https://docs.citrix.com/en-us/citrix-hypervisor/install/small-devices.html